I'm back from Thanksgiving break and ready to move along in my digital holiday gift creating. I had mentioned on Facebook that I planned to do some printable gift tags for you all. I finally got them done. I didn't have a printer at the lake house, so I had to wait until I got home to make sure they looked ok printed. I have uploaded them to Mediafire as a straight JPG file. This means anyone can open them and print them out. You don't have to have Photoshop! YAY! I would recommend printing them on a good, heavy cardstock. When you click the image, it will show you the full JPG file. You can just select print from your web browser to print.
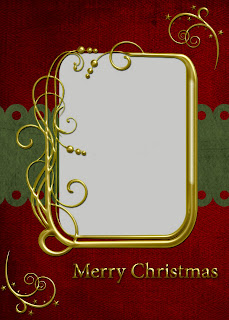
I also updated the Merry Christmas Card. This is a 5x7 PSD (Photoshop) file. You do need photoshop for this one and you should have a little bit of photoshop knowledge. It involves using a clipping mask. It's easy to do and I have the instructions included below. At the request of a former MCC student, I have added a gold 2010 to the Merry Christmas card. Thanks for the idea Gwen! When you click on the images below (both the Merry Christmas Card and the Snowy Card), you will be taken to the download site. There will be a message "Processing Download" and when that it done, look for a yellowy/gold box that says "Click here to download" or something along those lines. That will be your link. The only problem with these download sites is they have A LOT of advertising and it can be confusing at times.
I also added this new little creation...a snowy card! This snowy card is the same dealio as the other...you need to have photoshop and a little photoshop knowledge because there is a clipping mask involved (see instructions below). I've tried these on both PSE and CS3 and they work in both.
Now if you are unsure of how to create a clipping mask, here is what I do. The photo will be in the grayed out area once you have done this.
First, open the photo you want to use (if you need to do a landscape, you can easily use your move tool and turn this gold frame around to fit your needs). Once you have the photo open and cropped to your liking, do the following:
1. Move the photo over onto your card layout using the drag/drop. Place your photo layer just above the layer marked Clipping Mask Layer (you'll see the gray icon on the layers palette).
2. When you have your photo layer over the Clipping Mask layer, hover the cursor in the middle of the two layers while holding down your ALT key. You'll see two intersecting circles with an arrow, still holding down your ALT key, left mouse click now. You should see a little bent arrow by your photo and the photo should fit perfectly within your gold frame.
I'm not sure what I'll create this week - if anything. I'm booked solid with all kinds of stuff and I'm not sure I'll get to be as creative as I would like.
Enjoy the downloads and if you have suggestions for future, let me know! I'm always open for suggestions!!
Wednesday, December 1, 2010
Subscribe to:
Posts (Atom)


